 EN
Angry IP Scanner: review, download and setup
Angry IP Scanner: inventory an authorized local network, select address ranges, interpret results and understand reachability checks.
What is Angry IP Scanner used for?
Angry IP Scanner helps to get a list of nodes in a given address range and selected information about them. The program is useful for inventorying its own local network: for example, to find the address of the device after replacing the router or check whether the working computer is responding. The project offers Windows, macOS and Linux builds.
Before scanning, determine the allowed range and coordinate the verification if the network is working. Addresses of other organizations and wide ranges of Internet are not needed for home inventory. Start with a small known subnet and several own devices: so it is easier to understand the results and eliminate the erroneous choice of the network with an active VPN.
| Item | Details |
|---|---|
| Platforms | Windows, macOS, Linux |
| Use case | Network diagnostics |
| Download source | Use the project’s official page and choose the build for your operating system. |
| Version and terms | Current builds and conditions of use are given from the developer. The review does not record the unchanged version number. |
How to Read Angry IP Scanner Results
The program can show the availability of the node, name and results of port checks, depending on the selected settings and data collectors. These fields respond to specific network requests. The detected open port does not prove the vulnerability, and the lack of response does not prove that the device is off.
Compare the found addresses with the list of router devices or your inventory. The printer and laptop can respond differently because of the settings of the firewall. If you are looking for a specific service, first check it on a known device, then compare the result to another node in the same conditions. Do not change the range, number of threads and set of checks.
Download Angry IP Scanner from the official website
Select the supported platform on the project page. The link leads to the selection of the distribution, and does not start the installation automatically.
Use the official download address. Check the signature or checksum if the project publishes one. Keep secret configuration files private when contacting support.
Getting started with Angry IP Scanner
- Open the official website of Angry IP Scanner and select the build and requirements for your OS.
- Determine your network address and a small verification range allowed.
- Delete the active interface and the impact of the VPN so as not to scan another network.
- Select the desired fields and run checking several known devices.
- Compare the results with the list of the router and the availability of a particular service.
- Save the minimum required report and remove internal names and addresses from public appeals.
Angry IP Scanner interface and illustrations
Interface screenshots
The origin of the images is indicated in the sources below. The interface of the installed version may differ.
Angry IP ScannerScan results in Angry IP Scanner for Windows
1 of 2. Angry IP Scanner: Scan results in Angry IP Scanner for Windows
Limitations and data protection in Angry IP Scanner
Availability checks depend on the device's response, filtering rules, and measurement time. Do not use one result as a conclusion about network security. To investigate the problem, write down the range, settings and time: without them, two saved lists can describe different conditions.
In the production network, even a permit inspection requires approval by volume and time. Do not increase the load blindly and do not apply the results as a guide to the input to the detected devices. This review is limited to inventory and diagnostics of the resources you manage.
Alternatives for related tasks
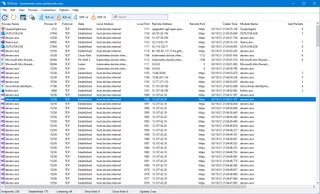
TCPView shows connections and processes on a particular Windows computer. Wireshark allows you to explore the observed network traffic. Angry IP Scanner is convenient when you need a list of the responding nodes in the agreed range. These are different levels of diagnosis, and the result of one program does not replace another.
Questions and answers
Does the lack of response mean that the computer is off?
Oh, no. The response can block the firewall or the selected verification method. Compare the result with the well-known service and information of the administrator.
The open port means the device is hacked?
Oh, no. It shows the availability of a certain network service under verification conditions. To assess the security, you need additional data about the service and its settings.
Can I check any network that is known?
Use your own or explicitly permitted resources for this review. In the working network, align the range, load and time with its owner.
Other tools for similar tasks
Microsoft Sysinternals TCPView
Microsoft Sysinternals TCPView: official download and a guide to interpreting Windows processes, TCP and UDP addresses, and connection states.
Review and setup →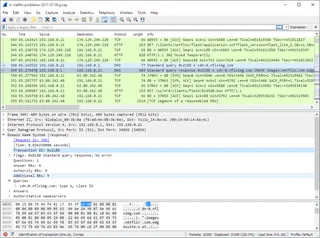
Wireshark
Wireshark: analyze your network traffic, choose an interface and filters, read captures and handle PCAP files safely.
Review and setup →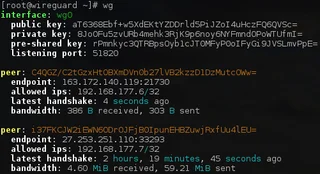
WireGuard
WireGuard: what a VPN tunnel does, where to download the client, and how to check keys, routes and DNS after connecting.
Review and setup →Related reading

Passkey, TOTP or SMS: protection of the exchange account
Selection of the method of entry and preparation of access recovery.
Read article →
Fake support for the exchange: how to check the request
Checking the access to the installation of programs and the transfer of access.
Read article →About the author

Crypto, fintech and Web3 expert with a background in marketing. Covers digital-asset projects, industry risks and fraud prevention.
Professional websiteDocumentation and images
Official sources, image credits and review methods
- Download Angry IP Scanner
- Documentation Angry IP Scanner
- Questions about Angry IP Scanner
- Scan results in Angry IP Scanner for Windows: illustration source — Official materialsip angry.org; editorial illustration of the interface, rights of the rightholder.
- List of nodes in Angry IP Scanner on Ubuntu: illustration source — Official materialsip angry.org; editorial illustration of the interface, rights of the rightholder.
The review was prepared on the project documentation. The installation and independent testing of the distribution within this material was not carried out. The rights to the interface and the names are reserved for the respective rights holders.